Connecting amoCRM: how to get the integration keys
For Sales Workshop to create deals and contacts in your amoCRM, you register your own “external integration” in your amoCRM account and enter its keys in the platform settings. The keys are used only to connect your account — the integration is created and stays on your side.
The screenshots show the Russian amoCRM interface; the original label is given in brackets next to each English one.
Step 1. Create an integration
- In your amoCRM account, open the “amoMarket” section.
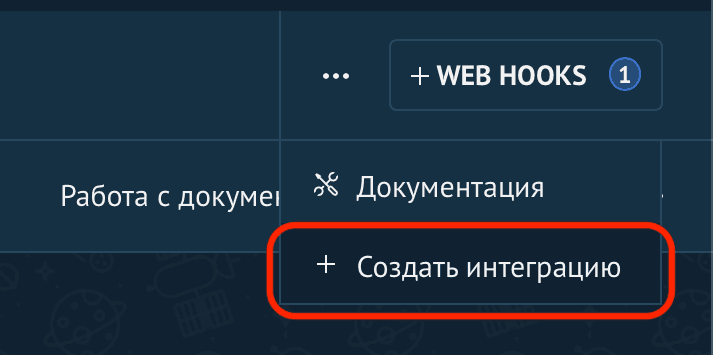
- In the top right corner of the page, click the three-dot icon (it sits next to the “Webhooks” button).
- In the menu that opens, choose “Create integration” (Создать интеграцию).
Step 2. Choose the integration type
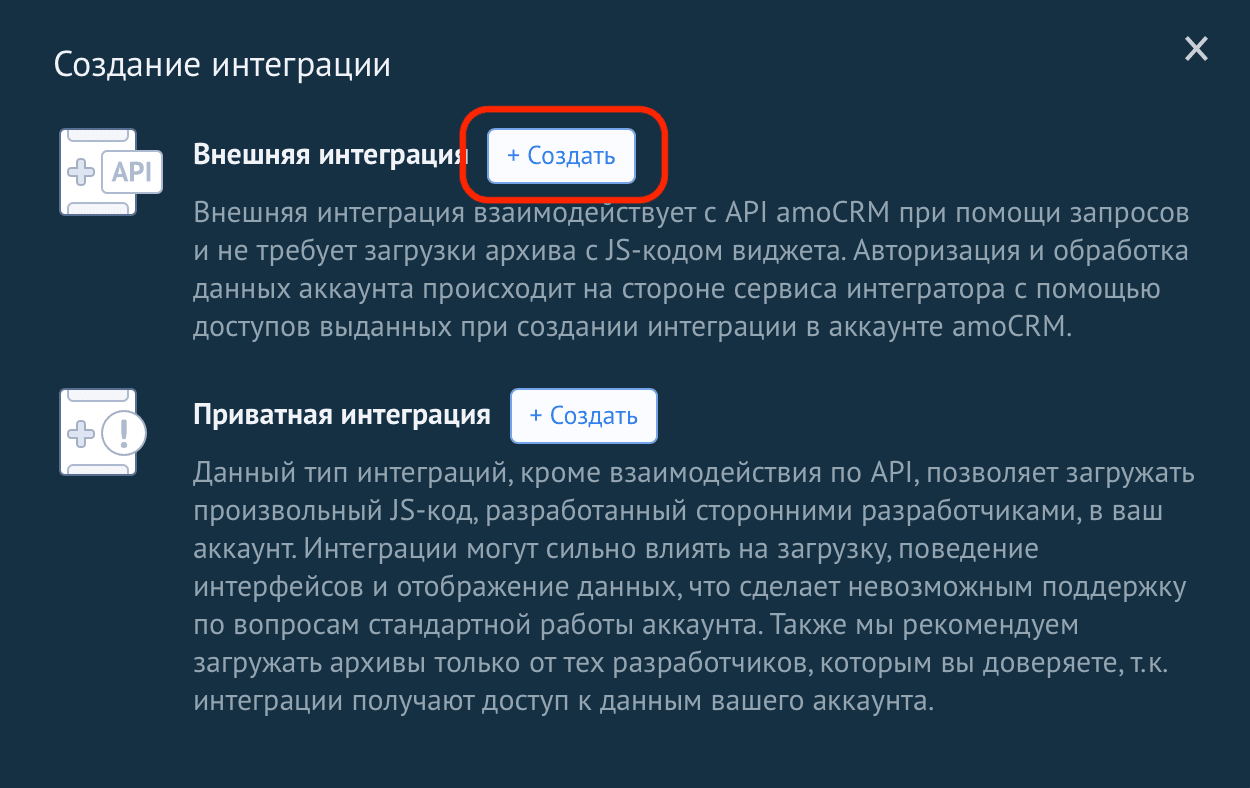
The “Create integration” window opens with a choice of types. You need “External integration” (Внешняя интеграция) — click “Create” next to it.
Step 3. Fill in the integration form
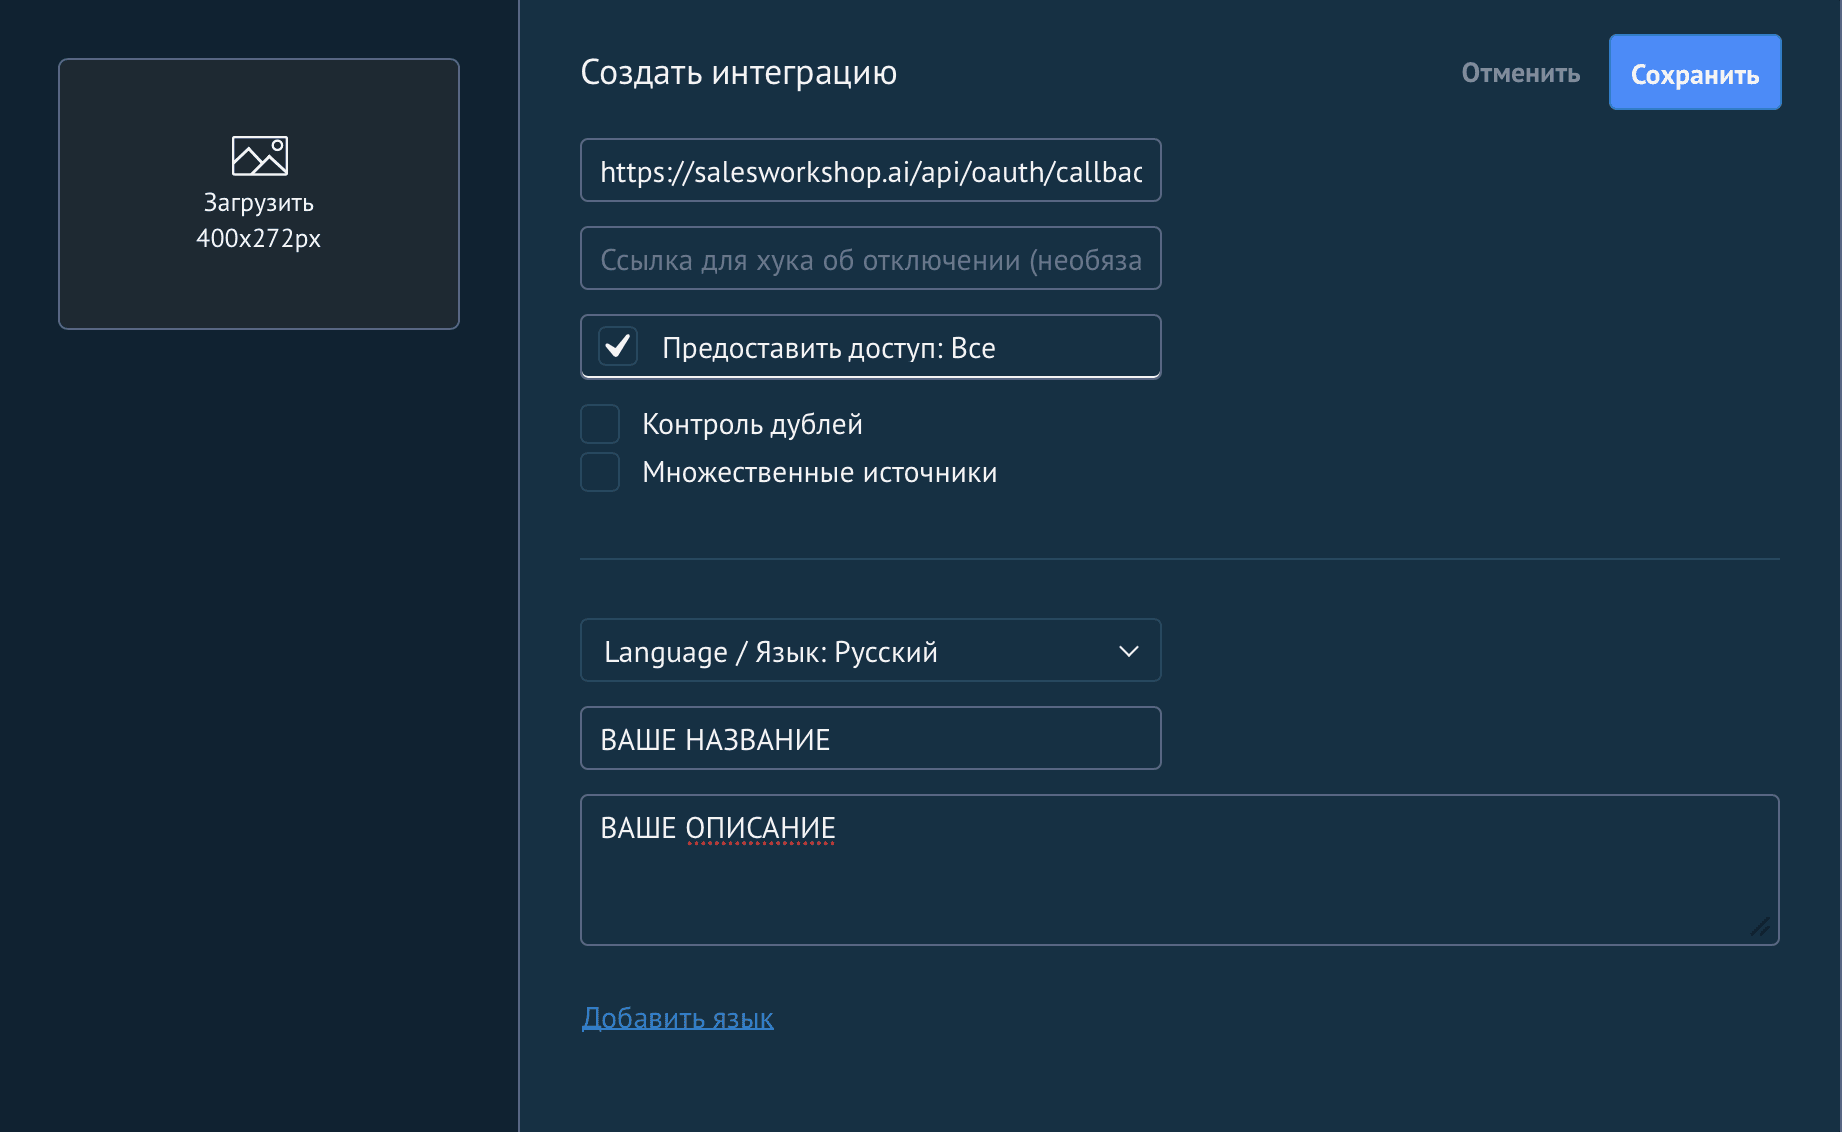
The “Create integration” form opens. In the “Redirect URI” (Ссылка для перенаправления) field, paste:
https://salesworkshop.ai/api/oauth/callback/amocrm
This URI is the same for every Sales Workshop customer — it belongs to the platform, not to your account. Below it, enable “Grant access: All” (Предоставить доступ: Все), enter any name (for example, “Sales Workshop”) and click “Save” (Сохранить). The other fields are optional.
Step 4. Copy the keys
After saving, the integration card opens with the “Description”, “Keys and access” and “Granted access” tabs.
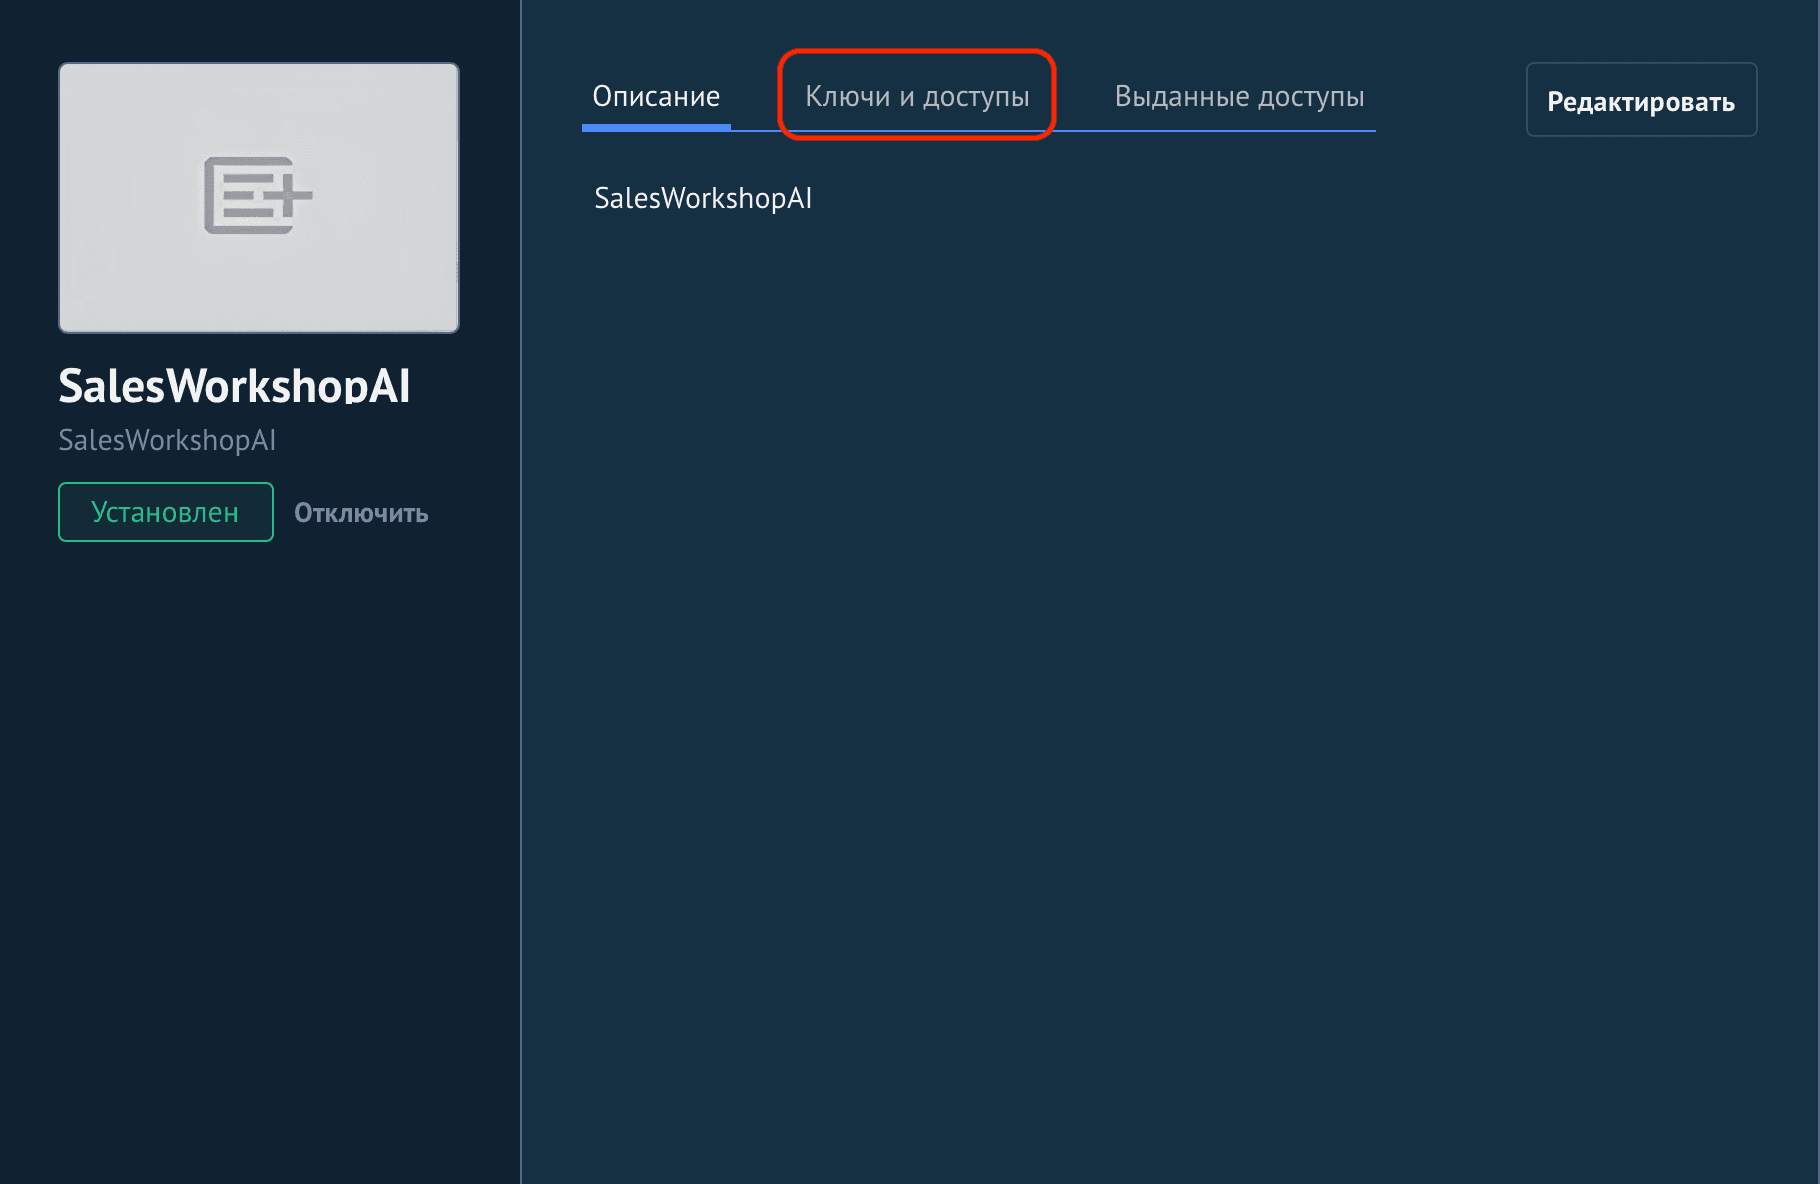
Open the “Keys and access” (Ключи и доступы) tab. The integration ID is already shown; for the secret key, click “Generate new key” (Сгенерировать новый ключ).
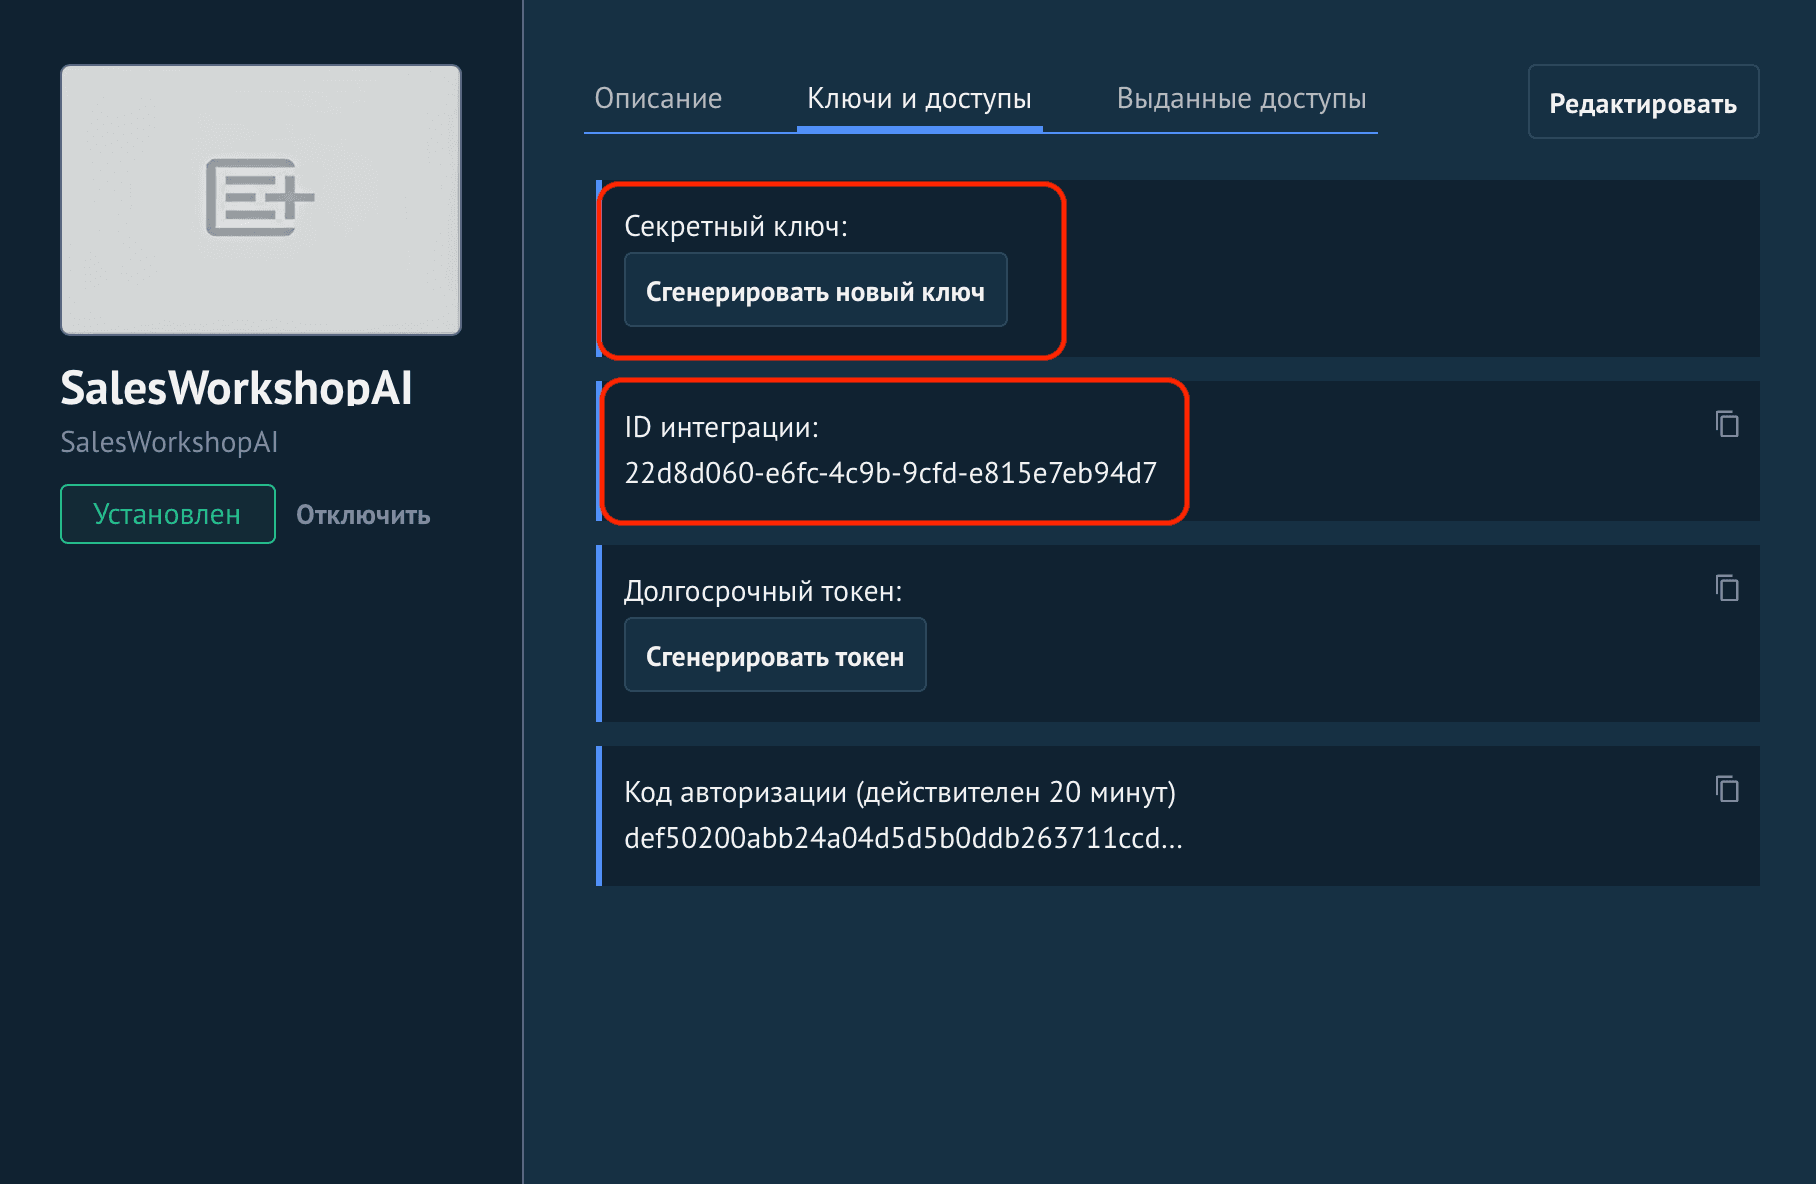
Paste the integration ID and the secret key into the amoCRM settings in Sales Workshop, together with your account address.
The account address is what you see in the browser's address bar while logged in to amoCRM:
https://youraccount.amocrm.ru/leads/...You only need the highlighted part — youraccount.amocrm.ru. Leave out https:// and anything after the domain. Then click “Authorize in amoCRM”.
Step 5. Paste the keys into Sales Workshop
In Sales Workshop's settings, open the “Leads & CRM” section → the amoCRM card. This is the same form the integration ID, secret key and account address from step 4 go into.
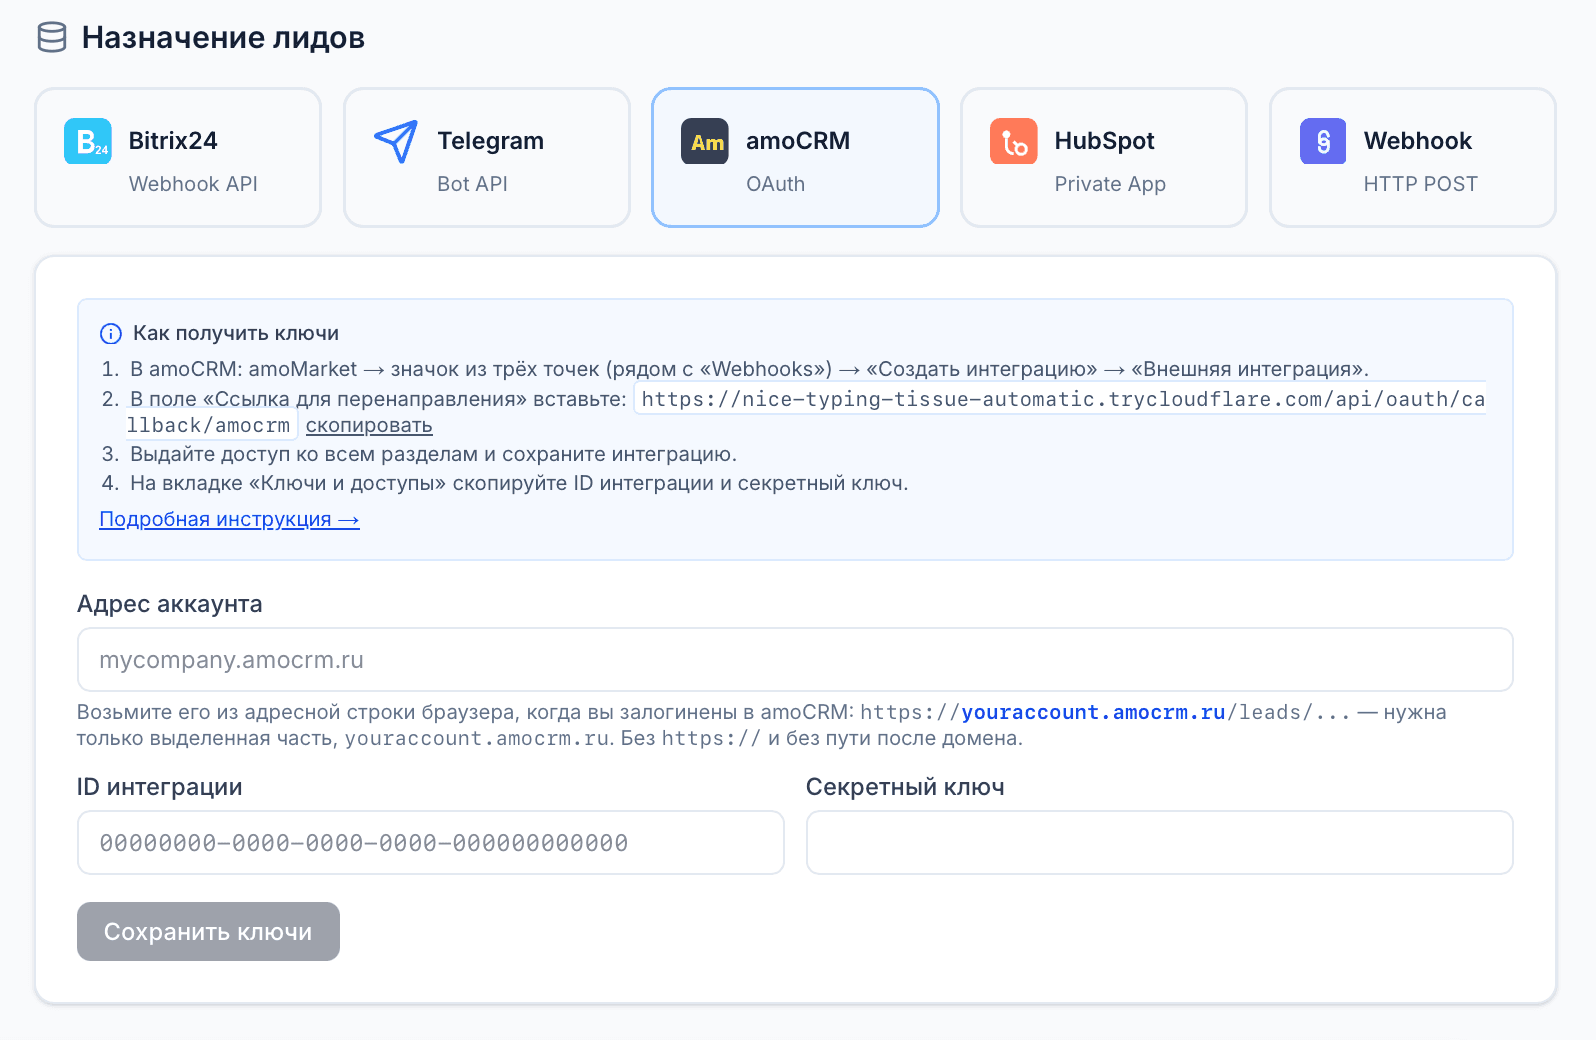
Click “Save keys”, then “Authorize in amoCRM”: an amoCRM access-request window opens, confirm it, and you're redirected back to Sales Workshop already connected.